Our Projects
GuideToRide.com Vibe Coded
I code a robust marketplace with AI
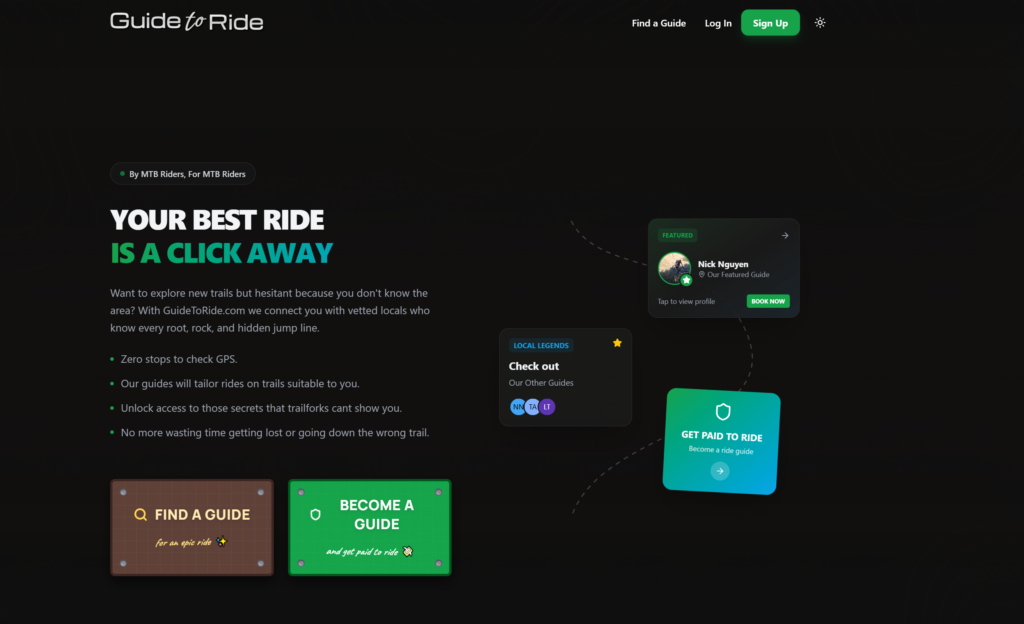
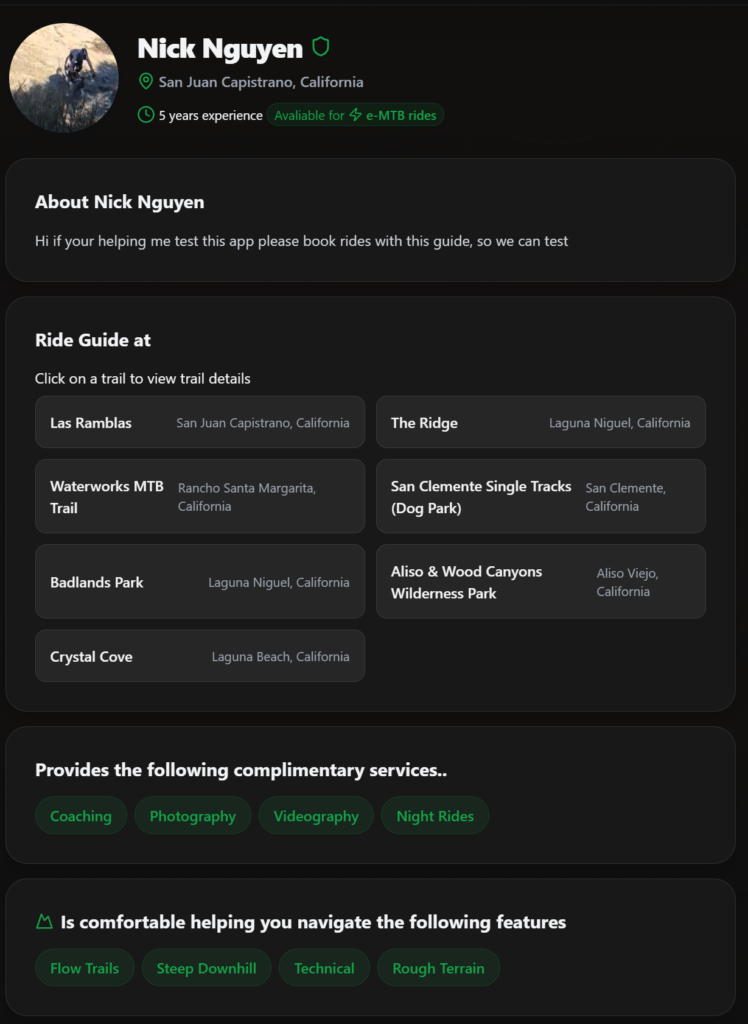
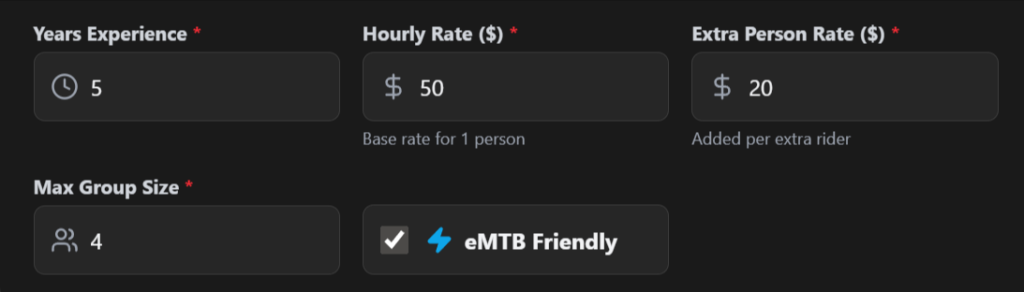
As a passionate mountain biker who loves exploring new trails, I found it challenging, and initially most of my time was spent getting lost. Along the way, I realized having a local show me around makes a huge difference in the fun factor of the ride. So I created guidetoride.com to address a common pain point for riders, with the solution being to connect riders with locals, removing the friction for exploring riders associated with exploring new trails, meanwhile supporting local community riders.
I gave up along the way, the technology wasn’t there yet. Anthropics’ Claude was the game changer; working with AI felt like I was collaborating with a senior-level developer. The most remarkable aspect was that AI didn’t require small talk and was available to work 24/7, which made the development process incredibly enjoyable and efficient. Initially, I encountered some minor mistakes—like variable names being incorrect or functions not quite aligning with my intentions. However, as the technology evolved, so did my AI partner’s capabilities.
Over time, it began making thoughtful recommendations that enhanced the coding process. While Claude was busy scripting, I seized the opportunity to immerse myself in learning about new tech stacks and APIs. This knowledge allowed me to effectively direct my AI partner in the implementation of various features. I found myself not just coding, but educating myself on how to optimize the development process.
In my quest for efficiency, I automated my workflow significantly. Implementing Docker streamlined my application environments, and I adopted a meticulous Git workflow to manage my code versions effectively. Leveraging AWS services like ECR and App Runner enabled me to achieve one-click deployments, significantly cutting down the time to launch updates.
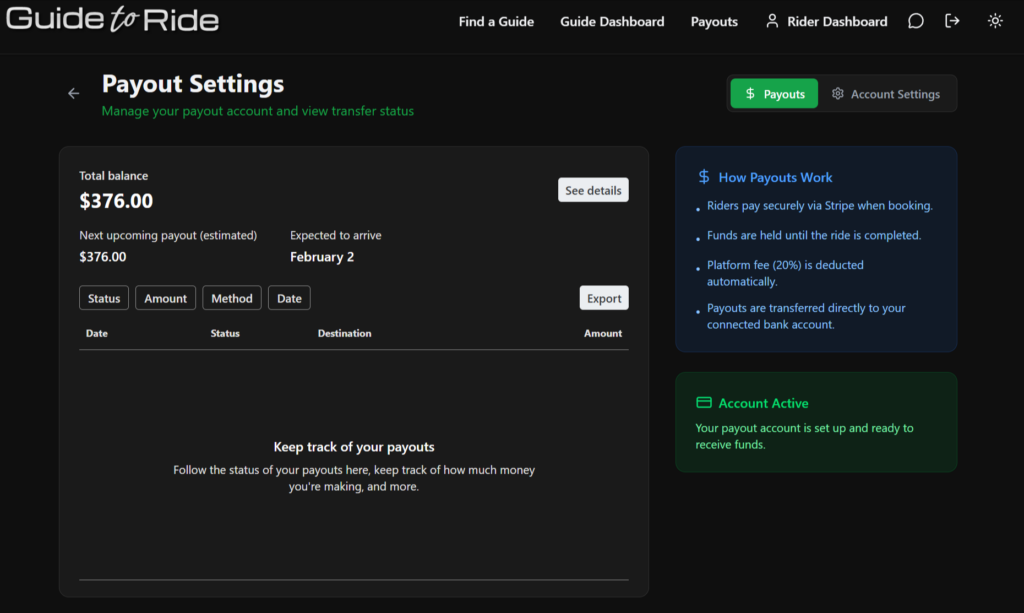
Additionally, I automated payment distribution through Stripe Connect accounts, which simplified the financial transactions related to the project. I also integrated Amazon S3 to serve the front end, ensuring fast and reliable access to static resources. To manage the connection between the backend and frontend efficiently, I utilized CloudFront, which provided low-latency delivery of my content.
This comprehensive automation of my development workflow has allowed me to focus on innovation rather than operational concerns. I no longer have to worry about scaling servers in production; the infrastructure I’ve built is robust and adaptable. The combination of an intelligent AI partner and a well-structured, automated system has transformed my approach to development, ultimately making the process smoother and significantly more productive.


AI Chatbots for WordPress: Enhancing Customer Support on Your Business Site
Today’s customers expect immediate attention. They’re not interested in waiting around—whether it’s a question at noon or a request in the middle of the night, they want answers right away. That’s where AI chatbots for WordPress step in: always available, never needing a break, and unfailingly polite.
The Case for AI Chatbots on Your WordPress Platform
Think of your website as the welcome mat to your business. If you’re using WordPress, you’re in good company—nearly half the internet relies on it. Yet, even the most visually appealing site can leave visitors frustrated if support isn’t readily accessible.
AI chatbots fill this gap seamlessly. They greet guests, resolve queries, and guide people through your site—all in real time. The result? Fewer missed opportunities, less customer frustration, and round-the-clock assistance.
More Than a Trend: The Real Value of AI Chatbots
AI chatbots aren’t just decorative features; they’re powerful business tools. Here’s what sets them apart:
- Immediate Assistance: People dislike waiting. Chatbots provide instant replies, keeping users engaged and satisfied.
- Effortless Scalability: Whether your site sees a handful of visitors or thousands at once, chatbots manage the influx with ease.
- Cost Savings: By automating everyday questions, your human team can focus on more complex requests.
- Actionable Insights: Every conversation is a source of valuable information—revealing customer needs, common obstacles, and opportunities for improvement.
Transforming Customer Support with AI
Picture this: a visitor arrives on your site at 2 a.m., searching for product details. Your chatbot is there, ready to help. It can:
- Address common questions (shipping, returns, pricing, and more)
- Direct users to relevant pages or products
- Collect contact information for future follow-up
- Escalate more complicated issues to a real person when needed
The outcome? More satisfied customers and increased conversions. It’s like having your top support agent available at all hours.
Integration Is Simpler Than You Think
Worried that adding AI to your WordPress site will be complicated? There’s no need. Today’s chatbots are designed for straightforward setup, often through plugins or quick code snippets. You don’t need to be a tech expert. Of course, if you’re aiming for a tailored solution, our WordPress specialists can help you create, deploy, and manage a chatbot that truly reflects your brand.
Beyond Support: SEO Benefits and Data Insights
Here’s an added perk: chatbots can give your SEO a lift. By keeping visitors engaged and lowering bounce rates, your site’s search rankings can improve. When users quickly find what they need, they’re more likely to stick around—something search engines appreciate.
Chatbots also collect a wealth of data. Curious about which products generate the most questions? Or where users tend to get lost? Your chatbot tracks it all, helping you fine-tune your site and content. If you want to turn these insights into higher search visibility, our SEO experts are ready to assist.
Cloud-Based Chatbots: Speed, Reliability, and Security
Performance is crucial. A sluggish or unreliable chatbot can do more harm than good. That’s why many businesses are shifting to cloud-hosted AI chatbots. Cloud solutions deliver:
- Rapid response times
- Consistent uptime—no more unexpected outages
- Effortless scalability as your audience grows
Need help setting up or maintaining cloud infrastructure for your chatbot? Our cloud services team is here to support you.
Custom AI Chatbots: Tailored for Your Business
While standard chatbots are great for basic inquiries, sometimes you need more. If you want a chatbot that understands your unique business, products, and customers, custom conversational AI is the answer.
Custom AI chatbots can:
- Sync with your CRM, inventory, or booking tools
- Navigate complex, multi-step conversations
- Communicate in your brand’s distinctive voice
Interested in a chatbot that’s as individual as your company? Explore our custom conversational AI solutions.
Chatbots for Every Device: Desktop, Tablet, and Mobile
Your audience isn’t limited to desktop computers—they’re browsing on smartphones and tablets, too. A well-designed chatbot works flawlessly across all devices. If you’re considering a mobile app with integrated AI support, our mobile development team can help bring your ideas to life.
Final Thoughts
AI chatbots for WordPress have moved from being a luxury to a necessity for businesses aiming to deliver top-notch customer service. They enhance satisfaction, streamline operations, and enable you to grow without sacrificing quality. Whether you’re looking for a straightforward plugin or a fully customized solution, having the right partner makes all the difference.
Ready to upgrade your WordPress site with AI? From web development and SEO to cloud solutions and bespoke AI, we’re here to help. Because your customers deserve support that’s always available—and your business deserves every opportunity to thrive.

Building Your Own Multi-Agent AI Sales Platform with Real-Time Human Support
Have you ever wanted to create a sophisticated AI sales system that combines multiple specialized AI agents while allowing human team members to monitor and step in when needed? In this DIY guide, I’ll walk you through how we built our own system using OpenAI’s Assistants API, WebSockets, PHP, and React.
What You’ll Need
- A web server with PHP support (we used WAMP)
- MySQL database
- OpenAI API key
- Basic knowledge of PHP, JavaScript, and React
- Familiarity with WebSockets
Step 1: Set Up Your Project Structure
Start by creating your project directory structure:
CopyInsert/your-project-name/
├── admin/
│   ├── index.php
│   └── login.php
├── vendor/
├── config.php
├── index.html
├── style.css
├── websocket_server.php
└── composer.json
Step 2: Configure Your Environment
Install required dependencies using Composer:
{ "require": { "cboden/ratchet": "^0.4.4", "openai/client": "^1.0.0", "phpmailer/phpmailer": "^6.8" } }
Create a config.php file with your database and API credentials:
<?php define(‘DB_HOST’, ‘localhost’); define(‘DB_USER’, ‘your_username’); define(‘DB_PASS’, ‘your_password’); define(‘DB_NAME’, ‘your_database’); define(‘OPENAI_API_KEY’, ‘your_openai_api_key’); // Define your OpenAI assistant IDs define(‘AISALESMANAGER’, ‘your_manager_assistant_id’); define(‘NEWSALESAGENT’, ‘your_new_sales_assistant_id’); define(‘EXISTINGSALESAGENT’, ‘your_existing_sales_assistant_id’); define(‘ESTIMATESAGENT’, ‘your_estimates_assistant_id’); // For email notifications define(‘SMTPUSER’, ‘your_smtp_username’); define(‘SMTPPASS’, ‘your_smtp_password’); ?>
Step 3: Set Up Your Database
Create your MySQL database with the necessary tables:
CREATE DATABASE your_database;
USE your_database;

CREATE TABLE conversation_summaries (
    id INT AUTO_INCREMENT PRIMARY KEY,
    thread_id VARCHAR(255) NOT NULL,
    user_ip VARCHAR(45) NOT NULL,
    summary TEXT,
    current_agent VARCHAR(255),
    status ENUM('active', 'completed') DEFAULT 'active',
    created_at TIMESTAMP DEFAULT CURRENT_TIMESTAMP,
    updated_at TIMESTAMP DEFAULT CURRENT_TIMESTAMP ON UPDATE CURRENT_TIMESTAMP
);

CREATE TABLE messages (
    id INT AUTO_INCREMENT PRIMARY KEY,
    thread_id VARCHAR(255) NOT NULL,
    message_id VARCHAR(255) NOT NULL,
    role ENUM('user', 'assistant', 'system', 'admin') NOT NULL,
    content TEXT NOT NULL,
    created_at TIMESTAMP DEFAULT CURRENT_TIMESTAMP,
    INDEX (thread_id)
);
Step 4: Create Your WebSocket Server
The heart of our system is the WebSocket server that handles real-time communication. Here’s how to build it:
Create websocket_server.php:
<?php require 'vendor/autoload.php'; require_once 'config.php'; use Ratchet\Server\IoServer; use Ratchet\Http\HttpServer; use Ratchet\WebSocket\WsServer; use React\Socket\Server as SocketServer; use React\EventLoop\Factory; use Ratchet\ConnectionInterface; use Ratchet\MessageComponentInterface; class ConversationServer implements MessageComponentInterface { protected $clients; protected $clientThreadMap = []; // Map clients to thread IDs protected $userClients = []; // Track user clients private $conn; private $openAIClient; public function __construct() { $this->clients = new \SplObjectStorage; $this->userClients = new \SplObjectStorage; // Initialize database connection $this->conn = new mysqli(DB_HOST, DB_USER, DB_PASS, DB_NAME); // Initialize OpenAI client $this->openAIClient = \OpenAI::client(OPENAI_API_KEY); } // Implement the required methods: onOpen, onMessage, onClose, onError // [Add implementation details here] } // Create and start the server $loop = Factory::create(); $socket = new SocketServer('0.0.0.0:8080', $loop); $server = new IoServer( new HttpServer( new WsServer( new ConversationServer() ) ), $socket, $loop ); echo "WebSocket server running at 0.0.0.0:8080\n"; $loop->run();
Step 5: Build Your User Interface
Create a user-friendly chat interface using React:
- In your
index.html, set up the basic structure:<!DOCTYPE html> <html lang="en"> <head> <meta charset="UTF-8"> <meta name="viewport" content="width=device-width, initial-scale=1.0"> <title>AI Sales Assistant</title> <script src="https://cdn.tailwindcss.com"></script> <link rel="stylesheet" href="style.css"> </head> <body> <div id="app"></div> <script src="https://unpkg.com/react@17/umd/react.development.js"></script> <script src="https://unpkg.com/react-dom@17/umd/react-dom.development.js"></script> <script src="https://unpkg.com/babel-standalone@6/babel.min.js"></script> <script type="text/babel"> // Your React application code goes here </script> </body> </html> - Create your React chat component with WebSocket connection:
- function App() { const [messages, setMessages] = React.useState([]); const [threadId, setThreadId] = React.useState(null); const [inputValue, setInputValue] = React.useState(”); const [isProcessing, setIsProcessing] = React.useState(false); const socket = React.useRef(null); // Initialize WebSocket connection React.useEffect(() => { const wsProtocol = window.location.protocol === ‘https:’ ? ‘wss:’ : ‘ws:’; const wsHost = ‘localhost:8080’; const wsUrl = `${wsProtocol}//${wsHost}`; const newSocket = new WebSocket(wsUrl); // Handle WebSocket events (onopen, onmessage, onclose, onerror) // [Add implementation details here] socket.current = newSocket; return () => { if (newSocket) { newSocket.close(); } }; }, []); // Implement message handling and UI components // [Add implementation details here] return ( // Your chat UI JSX goes here ); } ReactDOM.render(<App />, document.getElementById(‘app’));
Step 6: Create the Admin Interface
Build an admin panel to monitor and manage conversations:
- Create
admin/index.php:phpCopyInsert<?php session_start(); require_once '../config.php'; // Implement authentication if (!isset($_SESSION['admin_authenticated'])) { // Show login form or authenticate // [Add implementation details] } // Fetch active conversations from database $conn = new mysqli(DB_HOST, DB_USER, DB_PASS, DB_NAME); $query = "SELECT * FROM conversation_summaries ORDER BY created_at DESC"; $result = $conn->query($query); ?> <!DOCTYPE html> <html lang="en"> <head> <meta charset="UTF-8"> <meta name="viewport" content="width=device-width, initial-scale=1.0"> <title>Admin Panel</title> <script src="https://cdn.tailwindcss.com"></script> </head> <body> <!-- Implement your admin UI here --> <!-- Left panel for conversation list --> <!-- Right panel for viewing and participating in conversations --> <script> // JavaScript for WebSocket connection and admin functions // [Add implementation details] </script> </body> </html>
Step 7: Configure Your OpenAI Assistants
You’ll need to create four different assistants in the OpenAI platform:
- AI Sales Manager: Configure with instructions to identify user needs and direct to the appropriate specialized agent
- New Sales Agent: Specialize in handling new customer inquiries
- Existing Sales Agent: Optimize for returning customer interactions
- Estimates Agent: Focus on gathering requirements and generating estimates
For each assistant, use the OpenAI web interface to:
- Create a new assistant with appropriate name and description
- Set up the model (we recommend GPT-4)
- Add detailed instructions for the assistant’s role
- Enable structured output for agent handoffs
Step 8: Implementing Agent Handoffs
The key to our multi-agent system is the handoff mechanism. In your WebSocket server, implement handling for structured outputs:
private function processAssistantResponse($threadId, $runId) {
    // Retrieve the run and check for structured output
    $run = $this->openAIClient->threads()->runs()->retrieve(
        threadId: $threadId,
        runId: $runId
    );

    // Check for structured outputs indicating agent handoffs
    if (property_exists($run, 'structured_outputs') && !empty($run->structured_outputs)) {
        foreach ($run->structured_outputs as $output) {
            if (property_exists($output, 'next_agent')) {
                $nextAgent = $output->next_agent;

                // Update the agent in the database
                $this->updateConversationAgent($threadId, $nextAgent);

                // Create a new run with the next agent
                $this->openAIClient->threads()->runs()->create(
                    threadId: $threadId,
                    parameters: [
                        'assistant_id' => $nextAgent
                    ]
                );

                return true; // Handoff initiated
            }
        }
    }

    return false; // No handoff
}
Step 9: Start Your WebSocket Server
Create a simple script to start your WebSocket server:
# start_websocket_server.bat
php websocket_server.php
Step 10: Testing Your System
- Start your WebSocket server
- Open your main site in one browser window
- Open the admin panel in another browser window
- Test the entire flow:
- Start a conversation as a user
- Observe the conversation in the admin panel
- Test agent handoffs by triggering different scenarios
- Test human takeover from the admin panel
Troubleshooting Common Issues
- WebSocket Connection Failures: Ensure your server allows WebSocket connections and that ports are properly configured
- OpenAI API Errors: Verify your API key and check OpenAI’s status page for service issues
- Database Connection Problems: Confirm your database credentials and that your tables are properly set up
- Agent Handoff Issues: Review your structured output format and ensure your assistants are properly configured

The Latest Mobile App we built
Navenu iOS and Android Apps
Leveraging the latest in programming technology with React Native, we successfully developed robust iOS and Android mobile applications for Navenu from a single codebase. This approach resulted in significant savings in both development time and cost.
Nick Nguyen, who heads projects at Internet Technology Services, was appointed as CTO at Navenu, where he spearheaded the comprehensive development of the application.
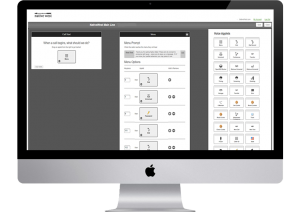
The powerful Navenu app launched successfully, featuring a curated network of over 500 venues across London and Dubai, alongside 100 curators/influencers. Key features include a personalized AI Concierge, unique “Venue Drops” (likely special offers or content), push notification capabilities, and a sophisticated publishing platform.

Navenu Showcase


Combating Robocalls with Robo-Bouncer
Case Study: Introducing the RoboBouncer – AI-Powered Call Screening

In this case study, we demonstrate how we bring our internet and programming skills to traditional telecommunications through a project we’ve dubbed the RoboBouncer.
The RoboBouncer is an intelligent bot designed to screen your incoming voice phone calls. When a call comes in, the system asks the caller to state their name and records it. It then places the caller on hold while simultaneously making an outbound call to your personal phone number. You are played the recorded name, and the system provides you with a clear option to either accept or reject the call.
With full programmatic control over call handling logic, the possibilities that the internet brings to traditional telephony are virtually endless. Beyond the RoboBouncer, we have experience setting up sophisticated phone systems, including:
- Interactive Voice Response (IVR) systems (e.g., company directories).
- Advanced lead transfer systems.
- High-volume outbound calling solutions.
To personally test out the RoboBouncer service, you are welcome to call our dedicated phone number: (949) 446-1716.
Following popular demand, we have also developed a commercial version that automates the deployment and setup of your own RoboBouncer instance. Click here to create your own RoboBouncer easily.
For those who are technically inclined, we have made the code and detailed information available in our BitBucket repository.
Creating a telephone call screening service using Twilio
This project demonstrates the creation of a call screening service utilizing the Twilio platform.
The Call Flow:
- Caller calls your Twilio Number: The system (the “agent”) answers and prompts the caller to speak their name, which is then recorded. The caller is subsequently placed in a queue (representing the “Inbound Call”).
- Outbound Call to You: Using the Twilio REST API, the system initiates an outbound call from your Twilio Number to your designated personal phone number.
- Playback and Options: When you answer, the recorded name of the caller is played back to you. You are then presented with the following options:
- Press 1 (DTMF) or Say “Accept” (SpeechResult): This action uses Twilio’s Dial verb to connect your phone to the caller who is waiting in the queue.
- Press 2 (DTMF) or Say “Reject” (SpeechResult): Using the REST API, the system notifies the waiting caller (e.g., with a message like “The person you are trying to reach is unavailable”) and then ends the call for both parties (hangs up on the caller in the queue and hangs up on your outbound call).
Technical Details:
- Uses the TWIML API and the Twilio Voice API PHP SDK.
- Utilizes the Queue resource and the Enqueue TwiML verb to place the caller on hold while the outbound call to you is made. Note: You could also use the Conference verb instead of Enqueue for potentially more options, simply by replacing Enqueue with Conference in the TwiML.
- To get started, follow this guide to set up your free Twilio account, get a phone number, and obtain your API SID and Token: https://www.twilio.com/docs/voice/quickstart/php
- Remember to configure the webhook for your Twilio phone number to point to your
step1.xmlfile (or select the appropriate TwiMLBin URL if using that).
Deployment Suggestion:
Setting up a dedicated web server isn’t strictly necessary. You can leverage Twilio’s own hosting features:
- Use Twilio TwiMLBins to host your XML files (like
step1.xml). Let Twilio handle the file hosting for you. - Use Twilio Functions for your server-side logic (converting the PHP logic to Javascript). The IVR Menu example in the Twilio documentation is a good starting blueprint for this.
I would strongly suggest using TwiMLBins for hosting XML files and, if you are capable, utilizing Twilio Functions for the server-side code to simplify your deployment.

Complete Business Start-up
Helping Native West Launch and Grow with Comprehensive Tech Solutions
We provided a wide array of technical solutions to help Native West successfully start their business and establish a strong digital presence. Our services included IP Phone Management, a custom Bidding System, and not only designing their website but also optimizing it to rank at the top of search engines.
Website Design
IT Services was responsible for both the design and development of the main Native West website.


SEO
Achieving Additional Site Links in Search Results
The term “Native West” presented a significant challenge for search engine optimization initially, as it was heavily dominated by content related to Native American topics. However, through proper site structure optimization and targeted SEO strategies, we quickly achieved the top spot in search engine results. Furthermore, their listing displayed with valuable additional site links, giving them increased visibility and click-through potential.
Phone System
Managed Phone System
We implemented a fully managed IP Phone System for Native West. This provided them with complete control and flexibility to customize call flow, directing calls efficiently to field agents, specific departments, or voicemail as needed.
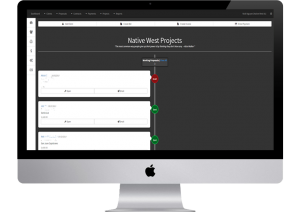
Management Platform
Bidding and Contract System
We developed a custom Management Platform that serves as the company’s operational backbone. This system is responsible for coordinating and connecting various departments – including Sales, Construction, Accounting, and Management – throughout the many complex stages of landscape construction projects, from initial bidding to final accounting.
Want more control over your company?
Schedule a free phone consultation to discuss how our solutions can help you streamline operations and gain greater control.

Is your account info compromised?
Demonstrating Data Security Risks: A Look at Compromised Credentials
We have curated a significant collection of over 1.5 billion hacked credentials (including usernames and associated passwords) sourced from various parts of the internet, including the “Deep Web/Dark Web” (often referred to as the internet underground). This substantial trove of data now totals over 40 Gigs – roughly equivalent to the storage capacity for approximately 13,000 songs on an MP3 player. As you can imagine, processing and managing data on this scale requires techniques far beyond typical web programming.
We hope you find the following functional demonstration both useful and informative. Even we were quite surprised to discover that a couple of our own accounts had been compromised based on this data.
To prevent any potential abuse, we can only show you a portion of the compromised password associated with any queried username/email.
Important Note: We strongly dislike SPAM. Any email addresses provided during this demonstration will not be redistributed or used for any other purpose.